


Welcome to the future of workflow automation! If you've ever dreamed of making your work processes more efficient, you're in the right place.
Today, we're diving deep into the advanced integration techniques of two powerhouses: Airtable and Zapier. This isn't just about connecting apps; it's about crafting a seamless, automated system that works as hard as you do.
Magical webhooks
At the heart of our journey lies the incredible tool of webhooks. But what are webhooks? Simply put, they're automated messages sent from apps when something happens.
In the realm of Airtable and Zapier, they act as vital messengers, triggering actions and passing data in real-time. This is where the magic of automation begins.
Airtable Automations
Airtable isn't just a database; it's a platform ripe for automation. With its built-in automation capabilities, you can create workflows that mirror and sometimes even surpass those in Zapier.
Imagine automating routine tasks directly within your database, saving time, and reducing the need for multiple tools. This section of our guide will show you how.
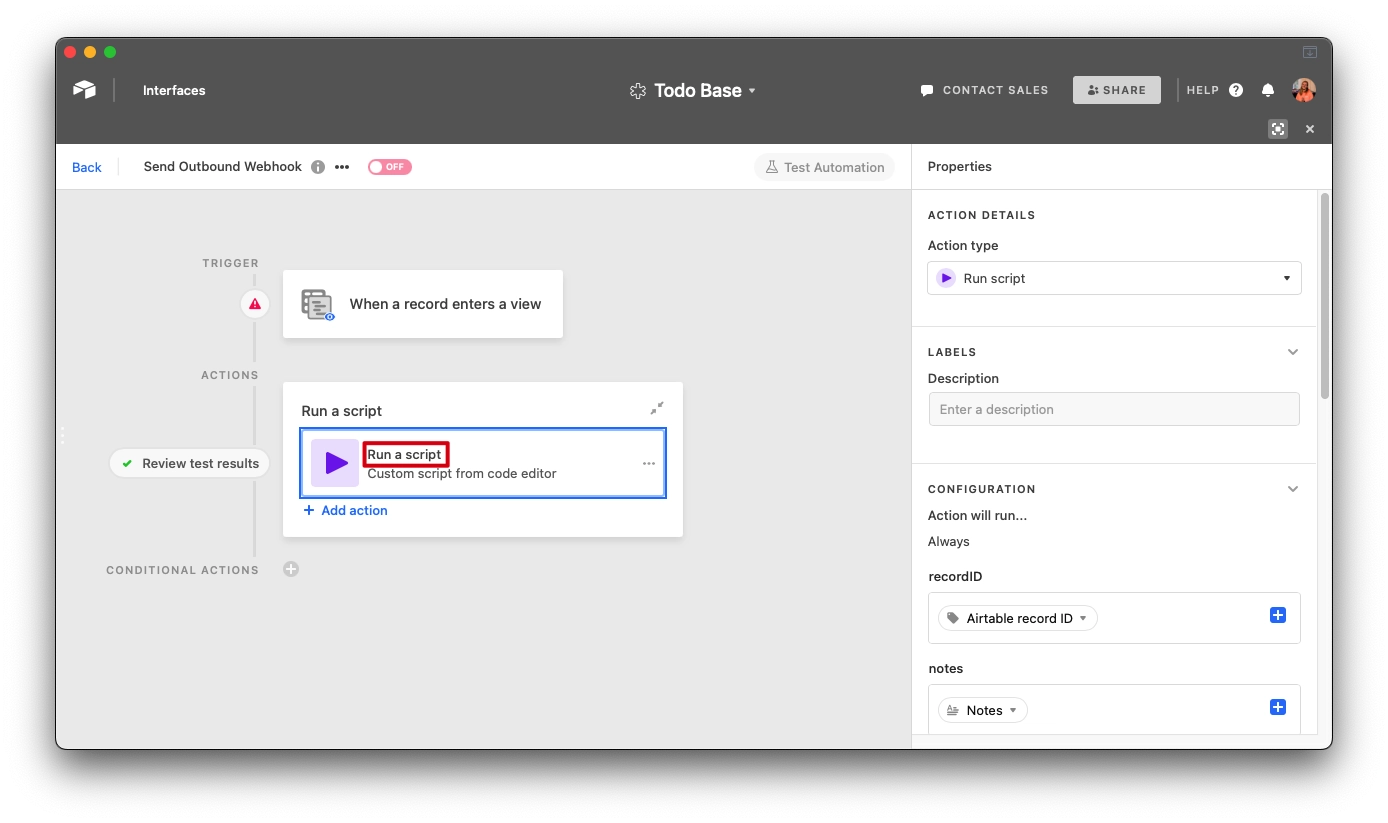
Script in Airtable
But why stop at basic automation? Airtable's scripting block is a goldmine for those who dare to delve deeper. It allows you to tailor your automations with precision, making your workflows not only efficient but intelligent.
We'll explore some scripting examples that will open new doors in your Airtable-Zapier integration journey.
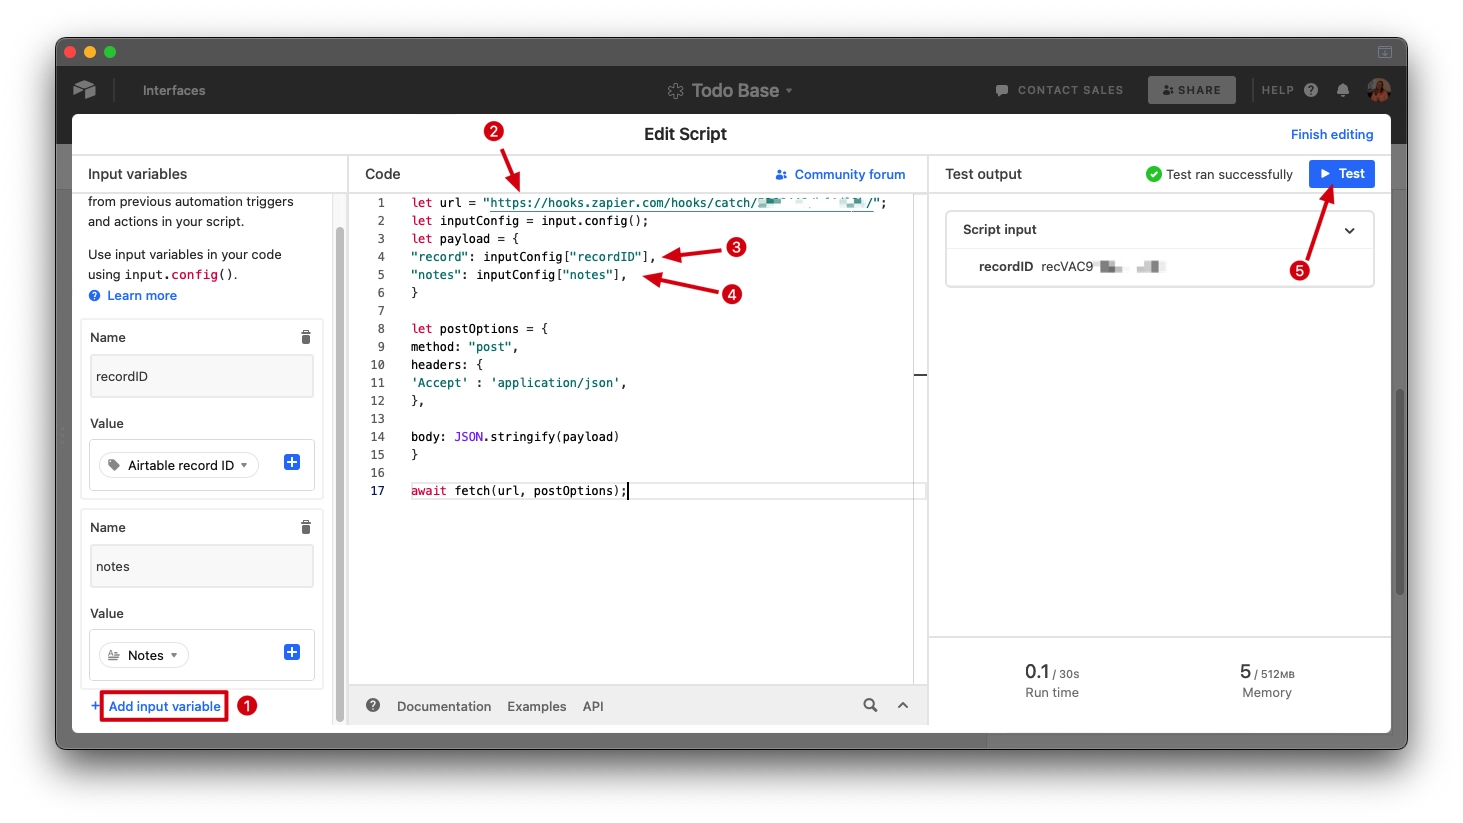
Add variables (1), and use the same keys in the code (3)(4)
Add the endpoint/catch hook (2)
Submit a test (5)
That’s it!
We can then test the action if needed and turn on the Airtable automation.
The code to use:
1let url = "https://hooks.zapier.com/hooks/catch/XXX/YYY/"; 2let inputConfig = input.config(); 3let payload = { 4 "aaa": inputConfig["aaA"], 5 "bbb": inputConfig["bbB"], 6} 7Button-Based Webhooks
Sometimes, you need a human touch in automation. This is where button-triggered webhooks come into play. They offer the best of both worlds: the efficiency of automation and the control of manual input. We'll guide you through setting up these buttons, empowering you to trigger complex workflows with a simple click.
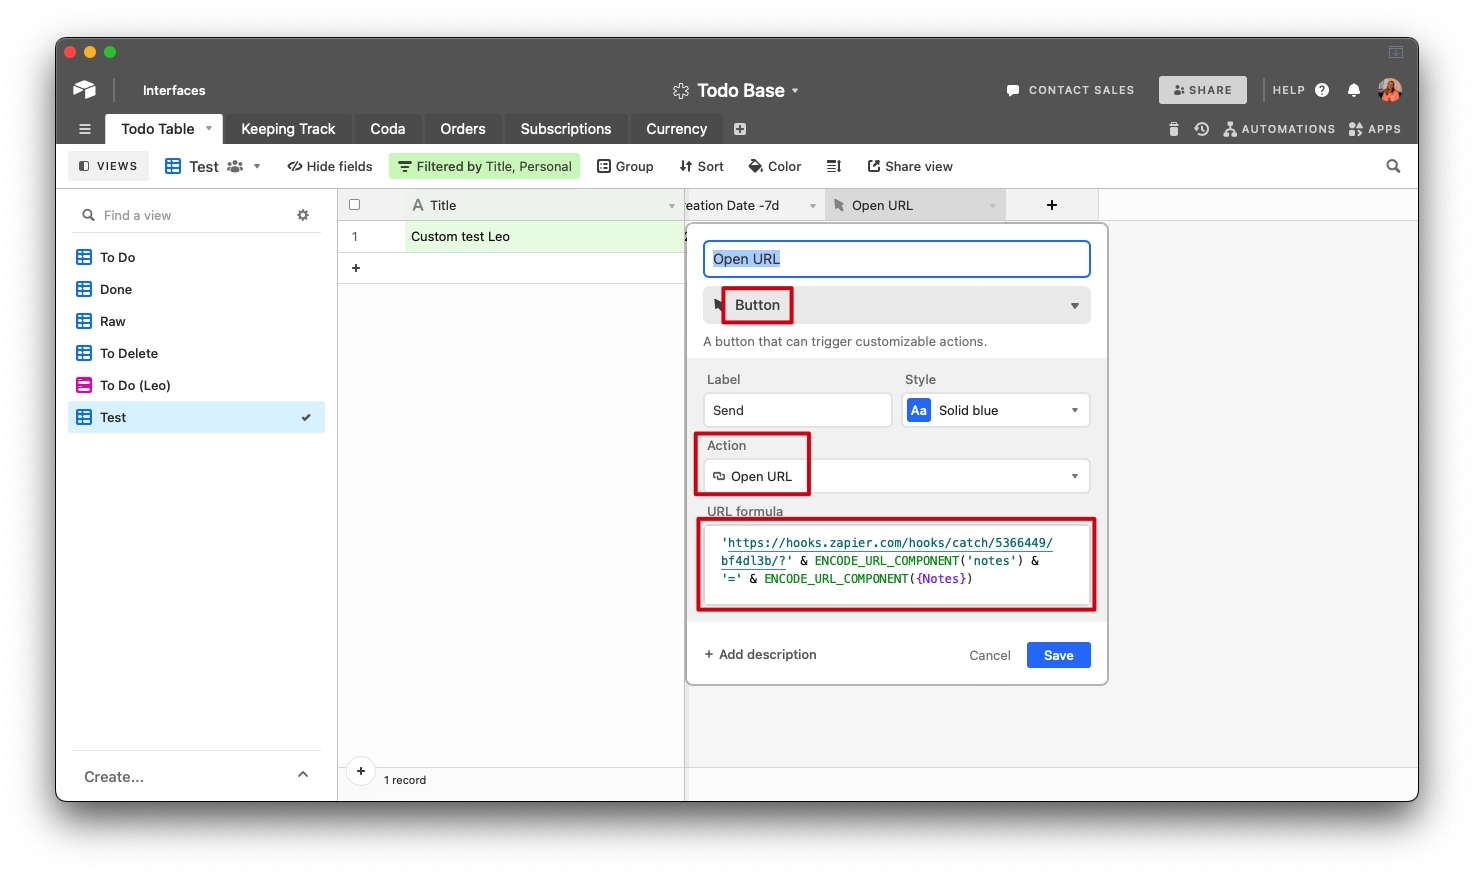
We’ll add a button field, and add the URL formula. The code to use:
1'https://hooks.zapier.com/hooks/catch/XXX/YYY/?' 2& ENCODE_URL_COMPONENT('ccc') & '=' & ENCODE_URL_COMPONENT({ ddd })3This looks a little funky at first, but this is the breakdown:
We’ll add the catch hook
Then use the
ENCODE_URL_COMPONENT()function to URL encode the parametersEach “part” you want to add needs to be added with a space, ampersand and another space
The
(ccc)is used to indicate which key is sentThe
{fff}is used to indicate the value in an Airtable field (aka column)The above code will add two params
cccandeeeand have values in fields{ddd}and{fff}Click on “Save”—and now you have a fancy button!
To note:
Clicking a button will always open a new tab. There is no way to silently open it
You can replace this with a scripting button, but this will open the application panel
You can use a checklist button and use a view + Airtable automation to send a webhook, which solves both issues
The button could also be useful to prefill an Airtable form (support link here).
More info on
URL_ENCODE_COMPONENT()can be found here.
Bonus: Downloading attachments at a click
Ever wished you could download attachments from Airtable with just a button click? Well, wish no more! In this bonus section, we'll walk you through a clever trick to achieve exactly that, enhancing your experience with Airtable and making your data more accessible than ever.
1RIGHT(LEFT({ Logo }, LEN({ Logo }) - 1), LEN(LEFT({ Logo }, 2LEN({ Logo }) - 1)) - SEARCH("https://", { Logo }) + 1)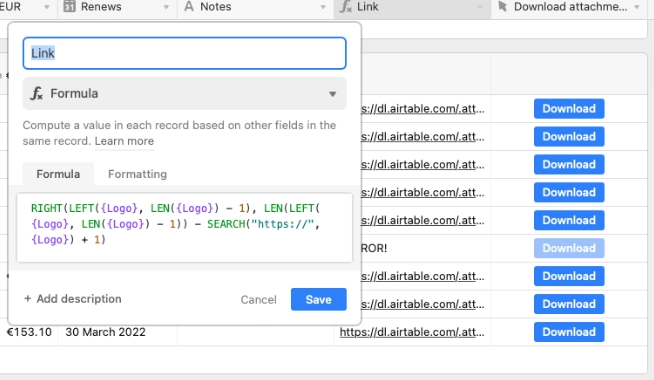
Now, it's time to unveil a button field, gracefully linking it to the freshly minted formula field. With a simple click, the path from our Airtable base to our local machine becomes a straight run!
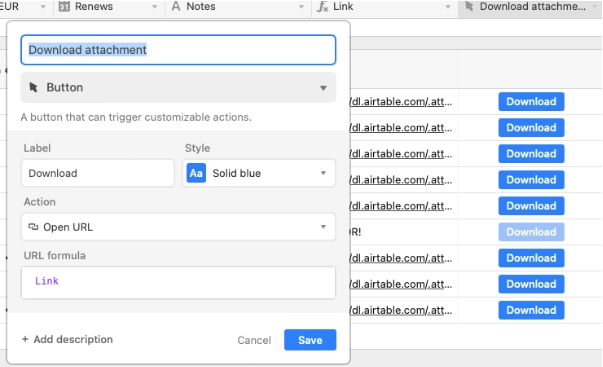
Finally, we can hide the formula field, so we can have a neat button in our Airtable base.
Wrapping up
I hope you find these insights helpful in your journey of mastering webhooks between Airtable and Zapier. If you have any intriguing tricks up your sleeve or if you use Airtable in a unique way, I’d love to hear about it in the comments below.

Comments